Volts Log 1: How I Used Fusion 360 for Fast and Easy 3D Designs
Introduction
Hello to whoever is reading this. This is the start of a tradition that I want to continue: writing a dev log after every milestone in a project. Essentially, it slows down the development process but helps tremendously in retrospectively finding out what went wrong and preventing repeated mistakes. So from now on, I’ll strive to create a dev log at every milestone and at least every month if the milestone is very far.
This dev log is for my 100Volts project. In essence, it is an open-source software for reading electric meters, water meters, and factory sensors, all based on the Modbus protocol.
What is Fusion 360 and Why Use It?
Fusion 360 is a CAD software, and a very easy-to-use one at that. In the past, I have used Blender for all of my 3D modeling needs. However, when it comes to specific measurements, it lacks precision in my opinion. If you want to use Blender as a replacement for professional CAD software, just don’t. Blender is mainly used for creative 3D models, concept renders, animations, and many more applications.
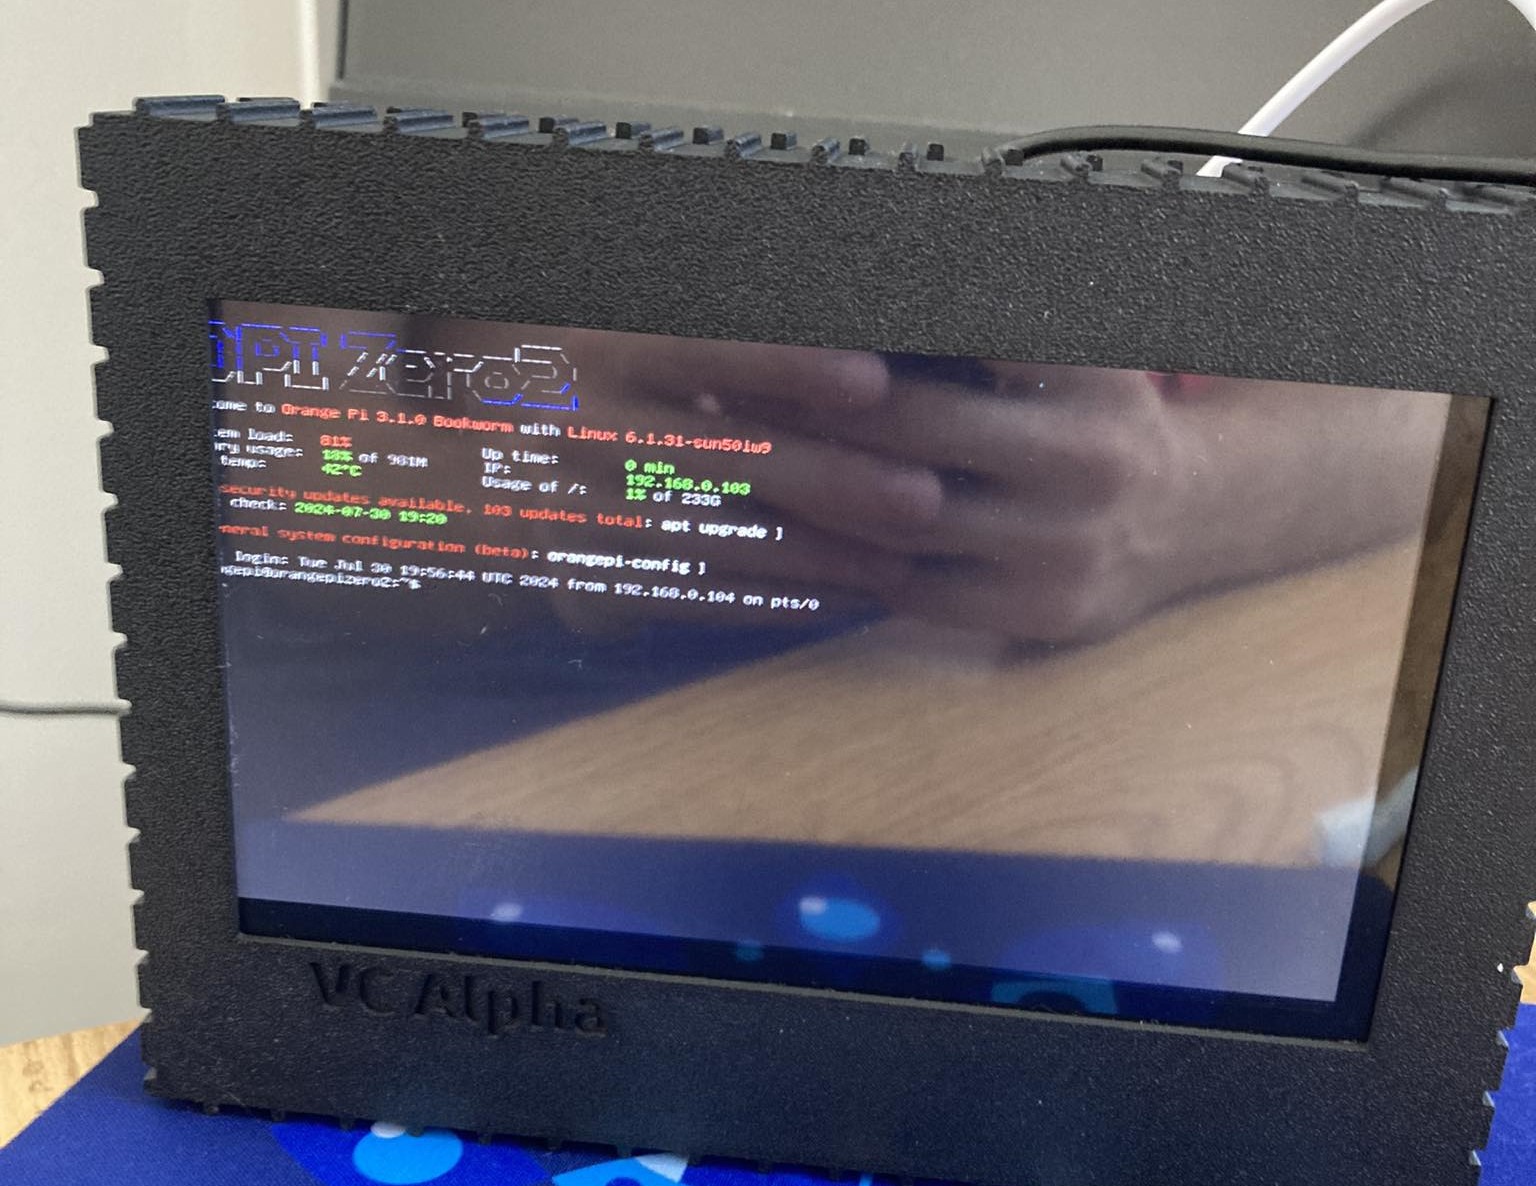
So why am I using Fusion 360? Well, it’s for a box that will housing my mini computer for the 100Volts project. This box will house a small single-board computer (SBC) that will act as a connector between the main server and the customer’s factory premises.
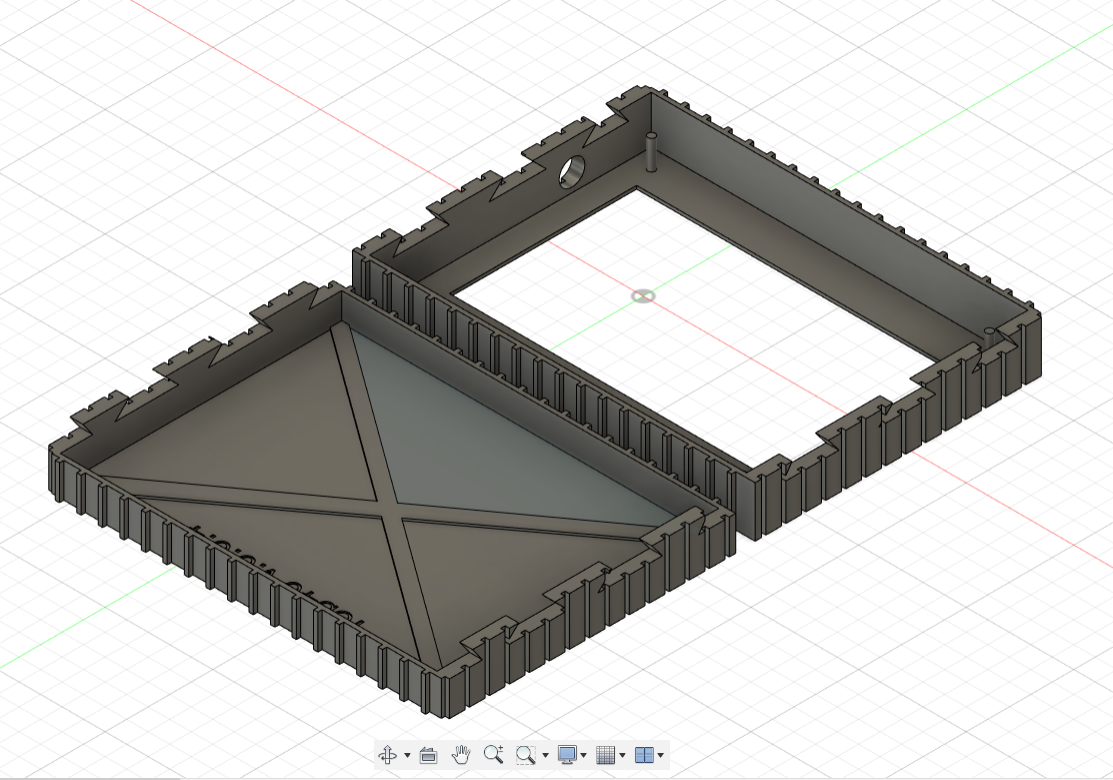
And this is it. It was very easy to create a 3D object. I did this in 4 days. Keep in mind that this was my second time using Fusion 360 before starting this project. After I had my 3D object done, it was very easy to export my creation into an STL file ready for 3D printing.
3D Printing
3D printing has always been an interest of mine. However, I don’t have a lot of experience working with a 3D printer, mainly because I don’t have one at home and have always used ones provided by my workplace. For this project, I used my workplace’s 3D printer. The printer is free to use if your prints are under 100 grams. That’s one of the benefits of working in a modern workspace like DXC, for which I’m thankful.
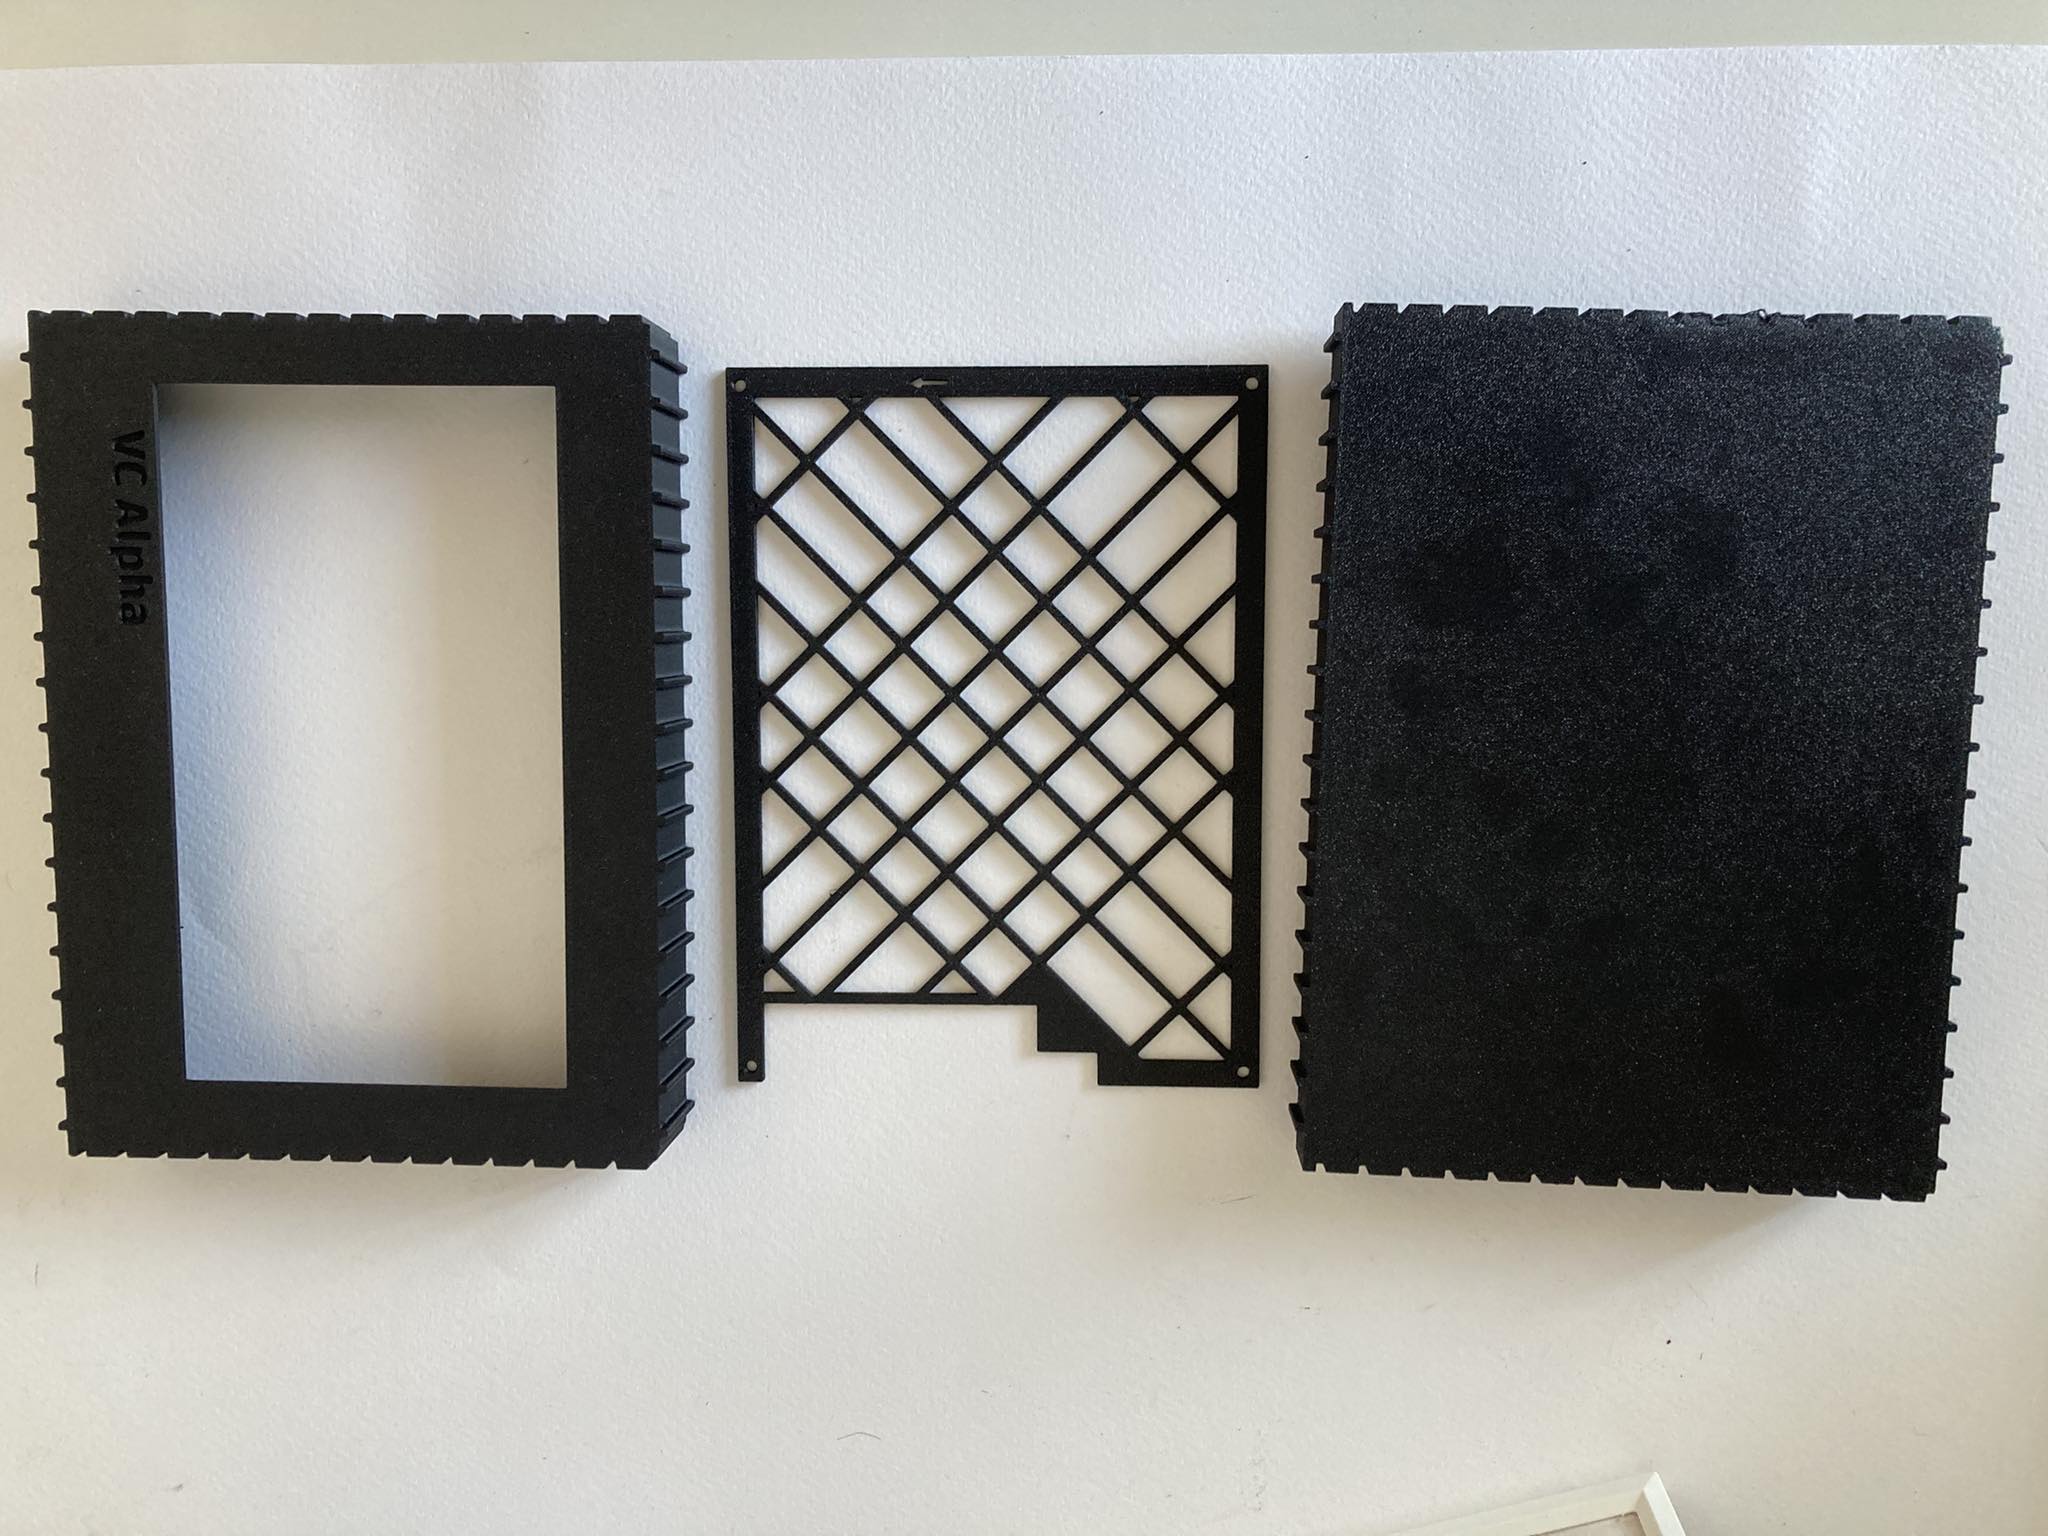
Assembly was easy due to the design of it. The printer I used was a Bambu Lab Carbon, which is a top-tier 3D printer. The print was completed in one hour and thirty minutes. The printer filament I used was the special Bambu Lab Carbon filament in matte black, which compared to other filaments, is very nice. It feels premium and not like the cheap plastic that other filaments feel like. It is rigid and very strong.

Finishing Notes
It was an awesome experience modeling and printing this device box. I recommend everyone wanting to create a 3D project to just start; it is very fun, and it gets very challenging and rewarding in the end.
Thank you for reading my first-ever dev log! I hope that this log sparks creativity to go out there and make something!